Very often there are recipes where it is necessary to sterilize jars already containing preparations. Thanks to this sterilization method, almost all preserves can be stored at room temperature. This is especially true for those who do not have a cold cellar.
If you are just starting canning and don’t know how to properly sterilize jars with blanks so as not to get surprises in the form of “explosive jars,” then this article will be relevant for you.
1. How to sterilize jars with preparations in boiling water
You can sterilize the workpieces in boiling water (this is the most common method).
To do this, take a wide pan and put a napkin or towel on the bottom.
Place the jars and pour water (the temperature of the water should be the same as the temperature of the preparations; if the water in the pan is cold or very hot, the jar may burst). The water should reach the shoulders of the jar. Cover the jars with lids (do not close them, just put them on top).

Boil the preparations for as long as indicated in a specific recipe.
If there is no specific time for sterilization, then most often jars with a volume of 0.5-0.75 are sterilized for 10 minutes; liter jars are sterilized for 15 minutes; two-liter - 20-25; three-liter - 25-30 minutes.
Be careful, the jars are very hot!
2. How to sterilize jars with blanks in the oven
This year I tried new way sterilization - in the oven.
For me this is the most convenient way. We'll see how the jars with the preparations behave after such sterilization in the winter.
Place the jars with the preparations on a baking sheet or on a wire rack and place in a cold or lukewarm oven.

Cover the jars with lids (do not screw them on, just put them on top). Bring the oven temperature to 120*C.

Sterilize jars with a volume of 0.5 for 10 minutes; jars of 0.75 are sterilized for 15 minutes; liter jars are sterilized for 15-20 minutes.
You need to remove the jars from the oven using special kitchen mittens, holding the jar by the sides with both hands. Be careful, it will be very hot!
How to sterilize lids for workpieces
Before sterilizing the lids, make sure they are undamaged.

You can sterilize the lids in a hot oven.
Can be sterilized together with jars in boiling water.
Most often, I sterilize the lids in a small saucepan of boiling water.
Proper sterilization is the basis for long and successful storage of seaming, so it is important to know and follow the basic rules of sterilization. Many people make seals for the winter, and by and large there is nothing difficult either in sterilizing the jars and lids themselves, or in sterilizing the jars with blanks. But those who have decided to prepare food for the winter for the first time may have many questions. How to sterilize jars? How many vegetables should I put in a jar? How much marinade should I add? How much water should be in the pan? What to take hot jar? And how to properly sterilize jars with blanks? What is considered sterilization time? I will try to answer these and many other questions from beginners in this article.
Any preservation begins with the preparation of vegetables and fruits. Wash the vegetables thoroughly in cold running water. If these are cucumbers or other vegetables that have had contact with the ground, then washing with a soft brush will not be amiss.
Place the washed vegetables or fruits in a clean enamel bowl, let the water drain and let the vegetables dry. Wash the greens no less thoroughly; the same requirement applies to drying.
How to sterilize jars and lids

Before sterilizing, be sure to wash the jars, even if they seem crystal clean to us. Jars and lids are washed with baking soda under running water. If the dishes are very dirty, first wash with kitchen soap, rinse, and then wash with baking soda.
The simplest and most trouble-free method of sterilizing jars and lids, which our grandmothers used, is boiling.
So, put a clean pan of water on the fire. Before putting the jar into boiling water, we first warm it up so that it does not burst. To do this, put some boiling water in a cup and carefully pour the water over the jar.
When the jar is warm, place it in boiling water. It is not at all necessary that the jar be placed in a standing position; it is convenient to place it on its side, which is why a wide pan is usually used to sterilize jars. We turn the jar so that it is thoroughly sterilized inside and outside on all sides.
We sterilize each jar for 2-3 minutes. Sterilize the lids in the same water for 2-3 minutes.
Carefully remove the hot jars from the water, leaving no water inside. The jars usually dry out instantly. Place the sterile jars on a clean table. Cover the jars with sterile lids.
How to sterilize jars with blanks
With clean hands, place washed and dried vegetables tightly in jars up to the shoulder line. The blanks cannot be laid all the way to the top; you should always leave a gap of at least one and a half to two centimeters. This is due to the fact that when heated, all bodies increase in volume (ordinary physics). If you place it all the way to the top, the contents of the jar will begin to spill out during sterilization.
We cover the jars with lids to prevent dust, midges, lint, human saliva, etc. from getting inside.
Prepare the marinade as indicated in the selected recipe. Usually per liter goes to the bank 1.5 cups of marinade, but it could be less depending on how tightly the vegetables are packed. It should be remembered that sea salt, iodized salt, and “Extra” salt are not suitable for seaming. We take regular rock salt. The marinade should boil well.
If indicated in the recipe, first pour the vinegar into the jar, and then the marinade.
Pour the boiling marinade into a jar with vegetables, be sure to leave a gap of one and a half to two centimeters, and the marinade should cover the vegetables. Cover the jar with a lid.
Usually the marinade is not poured into all jars at once, but one at a time. This means: pour the marinade into the first jar with the preparation, cover it with a lid, and set it to sterilize in boiling water. Then pour the marinade into the second jar, cover with a lid and place in the pan, then a third, and so on as many times as the jars will fit.
After sterilizing and sealing the first batch of jars with blanks, we repeat the entire process for the second batch: prepare (boil) the marinade, pour in one by one and set to sterilize.
What is needed to sterilize jars with blanks
For sterilization by boiling, a fairly large and wide saucepan is usually used, into which several cans/bottles can be placed. We pour the required amount of water into it, which we measure in advance; this is where knowledge of Archimedes’ law comes in handy. Put the pan on the fire.
When the water boils, place a clean towel on the bottom to avoid direct contact of the glass with the hot bottom of the pan.
We place the jars with the preparation on a towel. Pay attention to the water level in the pan. The water should not reach the neck of the jars by about 2 centimeters.
We place the jars in and remove them from the boiling water using special tongs, which are called “canning jar tongs.” It is advisable to purchase them, especially since they are inexpensive. These tongs are convenient for gripping hot jars, which greatly simplifies the task of sterilization.
What is considered sterilization time?
After placing the jars with the preparations in a saucepan with water, increase the heat. When the water in the pan boils again, note the time. This will be the beginning of the sterilization time countdown. The water in the pan should boil, but under no circumstances should it get inside the cans, so we adjust the heat in a timely manner.
In what order should you remove and roll up jars after sterilization?
We remove the jars from the boiling water in the same order in which they were placed in the pan. First we take out the one that was set to be sterilized first, and immediately roll it up. We take out the second jar, roll it up, put the lid down, take out the third, etc.
If you take all the jars out of boiling water at once and only then roll them up, the sterility of the workpiece may be compromised, because no matter how quickly you roll them up, latest banks they will still have time to cool down and take in unsterile air from outside.
Can jars and lids be sterilized in the oven?
Yes, jars can be sterilized in the oven, but first they should be thoroughly washed with baking soda, and only then sterilized. Place the washed dishes (without cracks or damage) in a warm oven. Gradually increase the oven heat to 150 degrees Celsius. We sterilize liter and half liter jars for 15 minutes. We sterilize 3-liter jars for 25 minutes.
The lids cannot be sterilized in the oven; they are sterilized in the usual way in boiling water.
Depending on the recipe, the jars are sometimes wrapped, for example, when rolling up jam. It should be remembered that wrapping extends the sterilization of the workpiece. On the one hand, it’s good, it’s more reliable, but on the other hand, it’s bad, because excessive heat treatment spoils the taste of homemade preparations, so cucumbers or zucchini can simply be overcooked. Therefore, when sterilizing workpieces, it is important to find a middle ground, and each time note in your cookbook what you did and how. Then next year you will be able to prepare for the winter, taking into account your amendments.
Reviews and comments:
Thank you for the article, my eyes were opened, now it’s clear where my mistake was.
Thank you very much for the detailed description.
Please tell me. Is it possible to sterilize already rolled up jars?
Natalya, there is sterilization of utensils (jars and lids) - this is ALWAYS done before food is placed in jars.
There are types of seaming in which sterilization of the workpiece is required. In this case, vegetables are placed in sterile jars, after which the jars are simply covered with sterile lids. The lids are not specially closed to allow air to escape. After the sterilization process is completed, the jars are sealed.
If we are talking about seaming without sterilization, then we only sterilize the jars and lids, but we do not sterilize the workpiece itself.
As for sterilizing rolled up jars, I don’t recommend it; the steam will tear off the lids, and as a result, both the food and all the work will go down the drain.
Recipes by ingredients
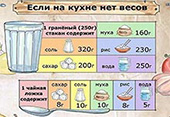
table of weights and measures

Kulebyaka with cabbage - tender and juicy
How to make delicious cabbage soup from sauerkraut

Honey cake - a quick and delicious recipe

Chicken Tabaka is delicious!

Beef goulash - quick and very tasty.
kerescan - Mar 22nd, 2015
Sterilizing full (filled) jars is another method for destroying microorganisms that contribute to rapid spoilage of canned foods, as well as sterilizing empty jars and lids. Sterilization full cans This is another way to keep your homemade preparations for the winter safe and sound. And how to properly sterilize full jars.
To do this, we will place kitchen towels or other clean cloth folded in 5-6 layers at the bottom of a wide pan. Instead of fabric, you can use a specially made wooden lattice or circle.
Place jars filled with homemade ingredients on top of the fabric.
Pour warm water into the pan. The temperature of the water being poured must be no less than the temperature inside the jar itself, because If there is a large temperature difference, our jars may simply burst. You need to pour in enough water to cover the jars up to their shoulders.
Cover the jars with metal lids, but do not screw them on.
Cover the pan with a lid and let it boil.
After boiling, reduce the heat. During sterilization, the water should not be allowed to boil violently, as if it boils too strongly, it can get inside our jars.
After boiling, boil homemade preparations depending on the size of the jar. Sterilization time for full jars:
0.5 liter - 10-15 minutes;
1 liter - 20-25 minutes;
3 liter - 30-35 minutes.
When the sterilization time has expired, carefully remove the jar and screw it on.
After twisting, I usually turn the jars upside down and wrap them in heat until they cool completely.
This is how you need to sterilize jars with winter preparations (full or filled) at home.
You can see how full jars are sterilized in the video. Here, however, more attention is paid to the sterilization of jars with metal clamps, but this does not affect the principle of sterilization itself.
Many recipes for homemade preparations for the winter require re-sterilization after they have been filled with vegetables, jam or compotes. Therefore, every housewife should know how to sterilize jars with blanks?
Usually, vegetable salads and all kinds of snacks (vegetable caviar, lecho, etc.), as well as pickled mushrooms, compotes, natural juices, and vegetable preparations without adding vinegar need pre-sterilization. Sterilization processes do not need to expose different types of jam, vegetables pickled with vinegar, for this you can simply sterilize empty cans. So, how to properly sterilize jars with blanks.
Sterilization of jars with preparations in boiling water

The most common and simplest way to sterilize workpieces is sterilization in boiling water in a deep container. To sterilize liter jars with blanks, you need to take a wide and fairly deep pan, place a cloth napkin, towel or wooden board at the very bottom.
Place the jars with the preparations in a saucepan, cover the top with pre-sterilized lids. Pour the required amount of water into the pan, the temperature of which should be equal to the temperature of the jars with the preparations. Because if the water in the pan is cold or very hot glass jars may burst due to temperature changes. Make sure that the water level in the pan is a few centimeters below the jars.
Place the pan with the ingredients over medium heat and bring the entire contents to a boil, after which the jars must be boiled according to the specified recipe. After the specified time, the jars need to be rolled up with lids. If a specific sterilization time was not indicated in the recipe for the preparations, then follow these recommendations:
- For cans with a volume of 500 milligrams, 10 minutes of time is enough;
- For a volume of 1 liter, 15 minutes is enough;
- For a volume of 2 liters – 20 minutes;
- For a volume of 3 liters – 25-30 minutes.
It will take a little longer to sterilize a jar of lettuce. In certain cases, the temperature of the water during boiling must be above 100 degrees.
How to sterilize a jar of ingredients in the microwave
Jars with blanks can also be sterilized in a microwave oven. Arrange the jars evenly in the microwave oven; there is no need to cover the top with lids. Since, as you know, metal objects cannot be placed in the microwave, so it is better to sterilize them in a separate container. The microwave oven must be set to full capacity, after which the workpieces in the jars should be boiled. Then set the microwave to the lowest power setting for 2 or 3 minutes. After this time, carefully remove the hot cans with oven mitts and immediately roll them up. This method is perfect for eggplant caviar (it will be finger-licking delicious).
How to sterilize jars with preparations in the oven

You can also sterilize jars with preparations in the oven. Place the preserved jars on a baking sheet or wire rack, place in warm or cooled water, and cover the tops of the jars with lids.
Set the oven temperature to 120 degrees. 500 milligram jars need to be sterilized within 10 minutes, and liter jars will take about 20 minutes. You need to be very careful when removing hot jars from the oven; use oven mitts or oven mittens to do this. Immediately seal the jars with lids.
Sterilization of lids for workpieces
Before sterilizing lids for preservation, carefully inspect them to ensure that there is no damage to their surface. You can sterilize the lids in boiling water along with the jars. You can also sterilize them in a ladle with pre-boiled water. It usually takes up to 10 minutes to sterilize the lids. Remove the lids using tongs to avoid burning your hands.
Sterilization is needed to clean jars from microorganisms. If this is not done, homemade preparations will ferment and the lids will fly off.
How to prepare lids and jars for sterilization
Check the jars for chips, cracks or rust. Containers without damage are suitable for preservation. The covers must be smooth, without scratches or rust.
Using a clean sponge, thoroughly wash the jars and lids. It is better to do this with soda, mustard powder, laundry soap or natural soap.
Place the jars on a baking sheet or wire rack when cold. How you install them - neck up or neck down - doesn't matter. of great importance. Jars can be placed in the oven immediately after washing.
Screw-on lids can be placed in the oven. Do not sterilize lids with rubber bands as they may melt. They need to be boiled in water for 10–15 minutes.

Close the oven and set the temperature to 100–110 °C. Keep the jars inside for about 20 minutes. The sterilization time does not depend on their volume.
Turn off the oven and leave the jars in there for a few minutes to cool slightly. You need to take them out with a dry towel. If it is wet, the jars may burst due to temperature changes.
2. How to sterilize jars by steaming over a saucepan
Fill the pan about halfway with water and let the liquid come to a boil. Place lids on the pan and place a colander, sieve or wire rack on top. Place dry jars on top, neck down.

You can use a special sterilizer. This device looks like a flat lid with one or more holes into which cans are inserted.

Small cans should stand over steam for about 6–8 minutes, cans with a volume of 1–2 liters - 10–15 minutes, and containers of 3 liters or more - 20–25 minutes.
When large drops of water appear on the inner walls of the jars, sterilization can be completed.
 prizyv.ru
 Remove the jars and place them upside down on a clean, dry towel. The lids must be carefully removed and also placed on a towel with the inside down.

Allow jars and lids to dry completely before canning.
3. How to sterilize jars by steaming over a kettle
Fill a regular kettle with water about halfway and boil it. If possible, place the lids in the kettle. If they don't fit inside, sterilize them in a pan of boiling water.
Place the dry jar in the opening of the kettle, neck down.

If the jar is small, you can place it on the spout of the kettle. Or put a masher in the kettle and hang the jar on it.

You need to hold the jars over steam for the same amount of time as in the previous sterilization method over a pan. Then they need to be dried on a clean towel.
4. How to sterilize steamed jars in a slow cooker or double boiler
Fill the bowl or steamers with water and place the lids on them. Install the steamer and place the dry jars on it, neck down.

Turn on the steamer or set the “Steam” mode in the multicooker. If the jars are small, you can close the device with a lid, but this does not play a significant role.
After the water boils, the jars should be sterilized for the same amount of time as over a saucepan or kettle. Place the jars and lids on a clean, dry towel and wait until they are completely dry.
5. How to sterilize jars in the microwave
Pour 1.5–2 cm of water into the jars and place them in. Select maximum power and turn on the timer for 3-5 minutes.

The water should boil, and the inside of the jars should be covered with large drops. Drain the water, place the jars upside down on a clean, dry towel and dry.
Lids cannot be sterilized in the microwave.
They need to be placed in a pan of boiling water for 10–15 minutes.
6. How to sterilize jars in boiling water
Place the jars, neck up, in a large saucepan. Place the lids nearby. Pour into pan and jars cold water so that it covers the necks.
If the jars do not fit in the pan, they can not be placed, but placed horizontally.

Bring the water to a boil and sterilize the jars for 15–20 minutes. Then place them neck side down on a clean towel to dry completely.


Ulyukaev, Navka and Patrushev
Income tax refund for treatment: registration procedure and calculation of the deduction amount
Import substitution - what is it?
OSAGO minimum insurance period
Abstract: Competition, its place and role in a modern market economy Studying new material